
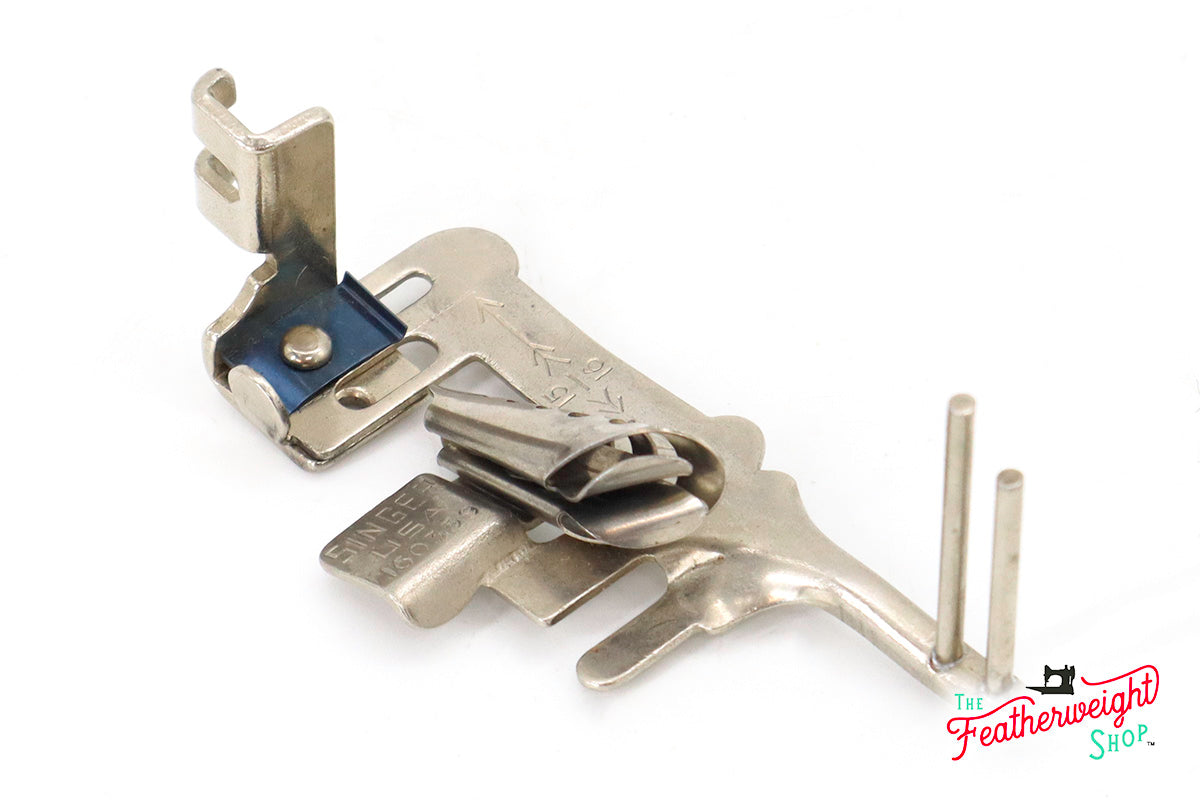
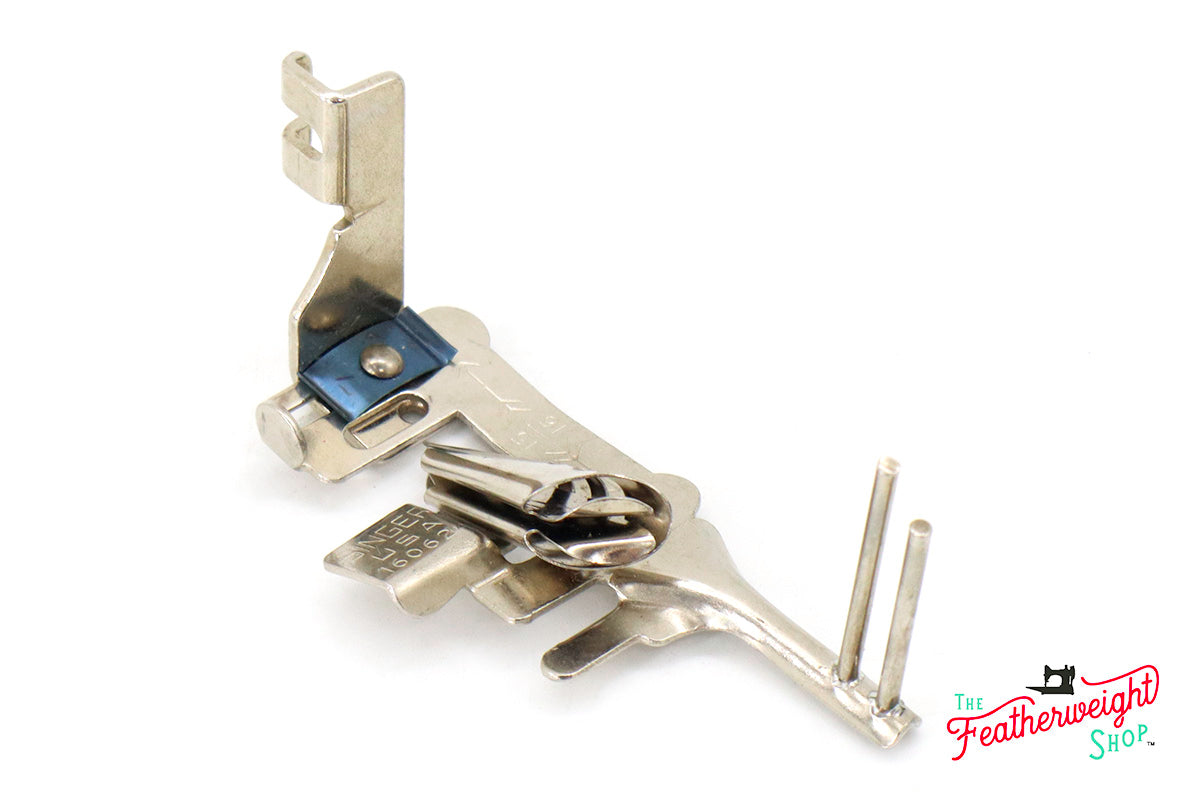
Multi-Slotted Binder with Guide Pins, (Vintage Original) - LOW SHANK
This item will earn you 59 POINTS in Sewciety Rewards.
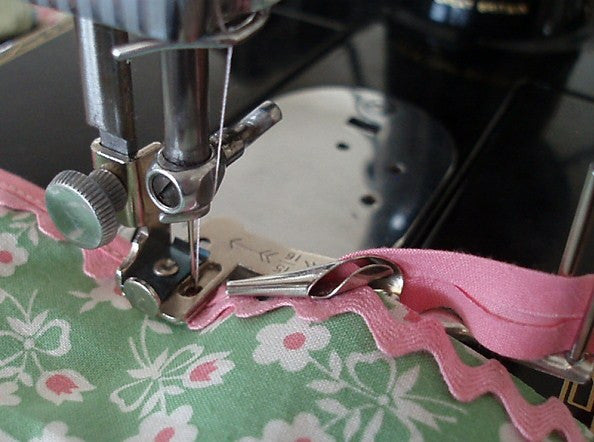
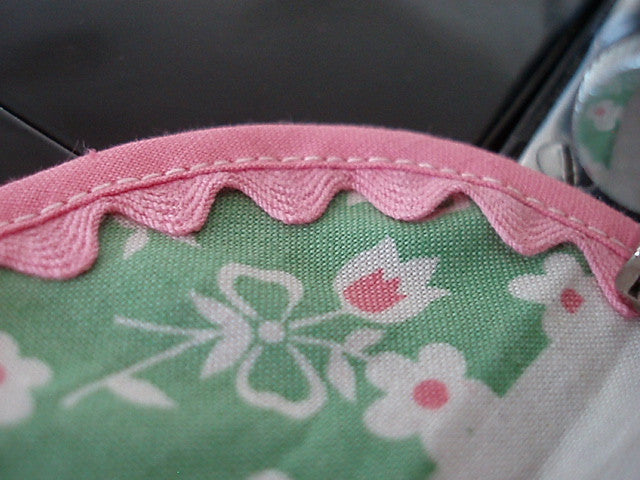
When using the raw fabric strips cut according to the correct width, this attachment will produce the same effect as sewing double-fold 1/4 inch pre-folded bias tape. All you have to do is slip your raw bias strips into the outer slot of the binder and the attachment will fold, crease and stitch the bias to your garment - all in one motion!
LOW SHANK: fits the Singer Featherweight 221, 222K and all low, vertical shank Sewing Machines (i.e. 15, 27, 28, 66, 99, 185, 127, 128, 192, 201, 206, 237, 306, 319, 320, 328, as well as many other brands besides Singer)
Here are the instructions for the Multiple Slotted Binder with Guide Pins.
Multi-Slotted Binder with Guide Pins, (Vintage Original) - LOW SHANK
Sale price$ 19.95
Regular price
Quick View
Multi-Slotted Binder with Guide Pins, (Vintage Original) - LOW SHANK
Sale price$ 19.95
Regular price