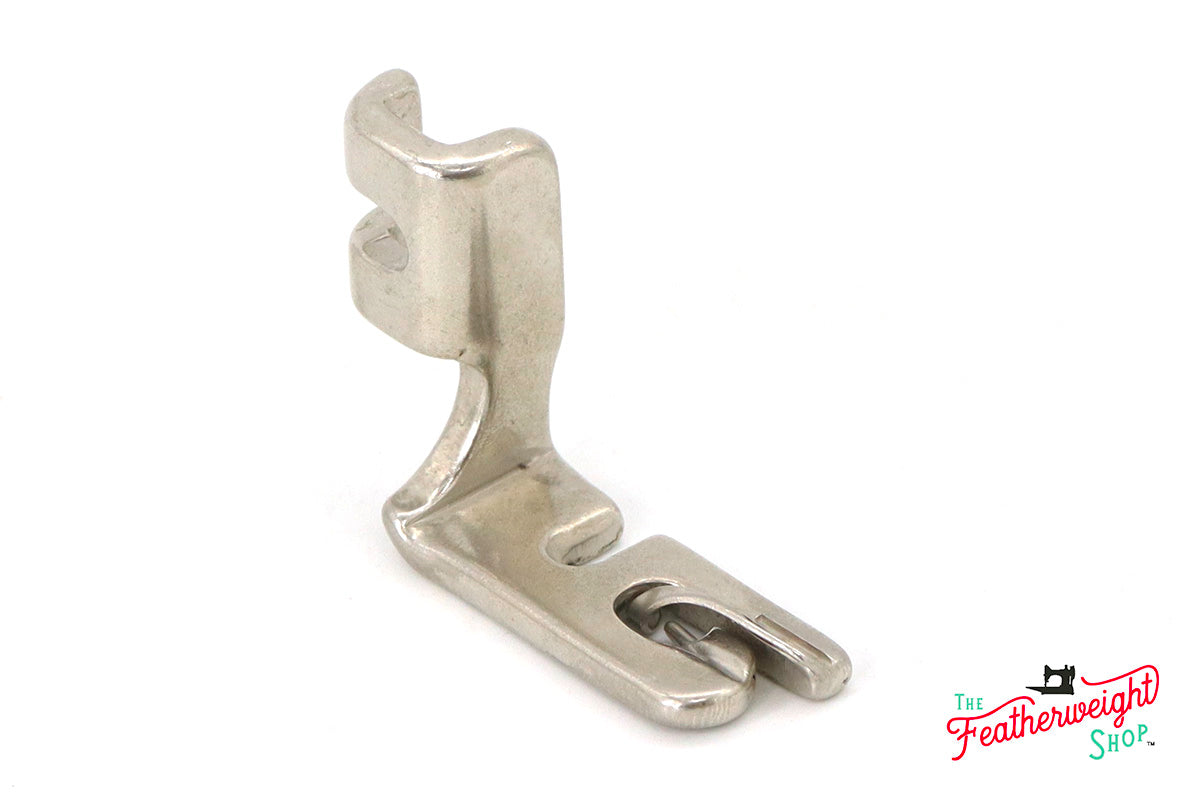
221 Accessory Instructions: The Foot Hemmer


History, dating, manuals, parts lists etc

Featherweight History –– Machine Dating –– Condition Chart ––Accessories ––Parts lists/numbers –– Owners' Manuals –– Workshop Manuals –– Featherweight Facts and Myths –– Freearm Applications –– Advertising Art Work –– Cleaning Your Machine –– Chamber of Horrors –– Identify Your Manual–– Approved Links


For the best selection of the finest available Featherweights

Standard Machines –– 1951 Centennials –– White/Green Models –– Freearm 222s –– Singer Featherweight Toys ––Spare Parts Sales –– Accessory SalesOur Guarantee –– Repairs/Servicing –– Motor rebuilds and voltage conversions –– What our customers say –– Lay-away plan

Quilter –– Foot Hemmer –– Adjustable Hemmer –– Under Braider –– Ruffler –– Edge Stitcher –– Gathering Foot –– Tuck Marker –– 222 Embroidery/Darner Hoop –– 221 Darning/Embroidery –– Multi-slotted Binder –– Zipper Foot –– Bias Gauge –– Cording Foot –– Seam Guide –– Zig-Zagger 161157 –– Zig-Zagger 160990 –– Blind Stitcher –– Buttonholer
Quilter –– Gatherer –– Foot Hemmer –– Adjustable Hemmer –– Under Braider –– Ruffler –– Edge Stitcher –– Gathering Foot –– Tuck Marker –– 222 Embroidery/Darner Hoop –– 221 Darning/Embroidery –– Multi-slotted Binder –– Zipper Foot –– Bias Gauge –– Cording Foot –– Seam Guide –– Automatic Zig-Zagger 161157 –– Automatic Zig-Zagger 160990 –– Blind Stitcher –– Buttonholer


Hemming and Sewing on Lace in one Operation
Start the hem, as explained and, when it is well started, raise the needle to its


highest point. Raise the hemmer to relieve the pressure on the hem, and pass the end of the lace through the slot in the side of the attachment and over the hem, as shown.
Take care that the hem is not displaced in the hemmer, and that the needle goes through both lace and hem. Then lower the presser bar, and guide the lace over the front of the hemmer, taking care to keep it well into the slot
.

The Foot Hemmer -- Felling
The two pieces of cloth should be laid, wrong side out, one over the other, with the edge of the under piece a little farther

The Foot Hemmer -- Hemming
Clip off the right hand corner of the material for its edge to curl easily. Then, with the hemmer foot raised, place the material from left to right under

the foot and, with its edge slightly raised, insert the corner into the mouth of the hemmer, easing it along until it fills the curl and reaches the needle. Lower the foot and make the first few stitches slowly. Guide the material with the thumb and forefinger of the right hand, so that the edge lies flat over the top of the hemmer, and proceed to sew, taking care to keep the hemmer curl just full. Should the edge begin to run out, move the hand to the left; should too much material run in, move to the right.

to the right than the upper piece, Stitch the two pieces together, using the front projecting part of the hemmer as a guide for keeping the seam straight.
This should be made close, but not too near to the edge of the upper piece, or the cloth will give way at the seam when a strain is put upon it. Raise the hemmer foot and
open the work out flat, wrong side up, so that the edges will stand up straight. Then push the edges at the beginning of the seam into the mouth of the hemmer, as far as the needle, and lower the
hemmer foot. While stitching keep the material perfectly flat, using both hands, and see that the seam is in line with the mouth of the hemmer. For the second seam, the stitch should be lengthened slightly.