


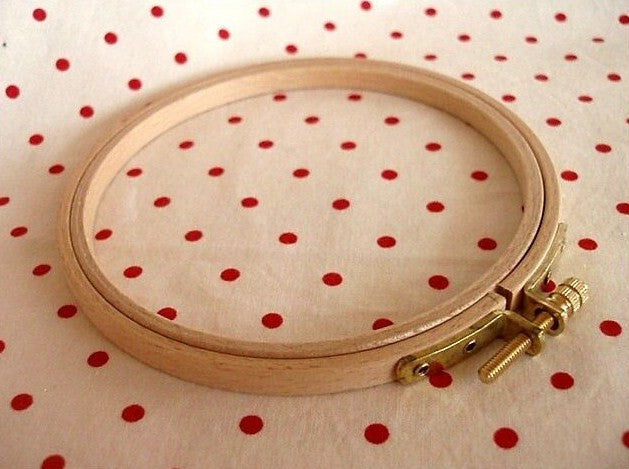
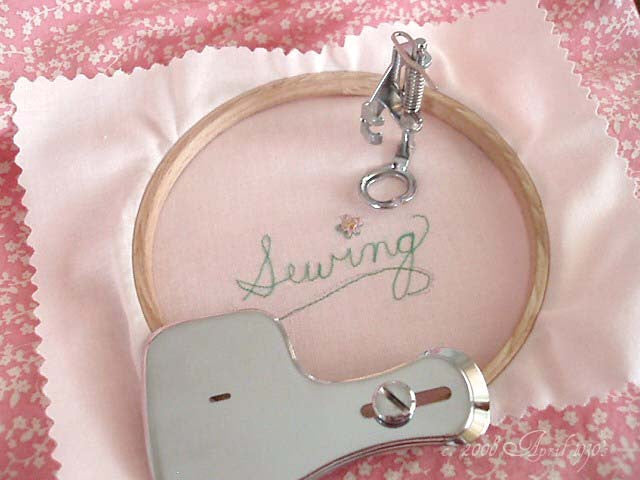
Embroidery Hoop, Machine Free-Motion Work
High quality wooden Embroidery Hoop that is specifically made for Machine Embroidery* - works perfectly for doing Free-Motion Machine Embroidery on your Featherweight 221 or 222 or any Sewing Machine.
You may ask which size is best? Well, I find that the 4-inch and 6-inch work best for the Featherweight machine, but I have been able to work the 8-inch as well, it just takes some maneuvering when working around the motor area at the back of the machine with the 8-inch. I would recommend the larger sizes for larger head machines such as the Singer 401 (401A), 500 (500A), 503, etc...
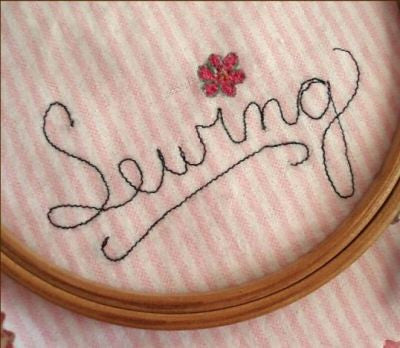
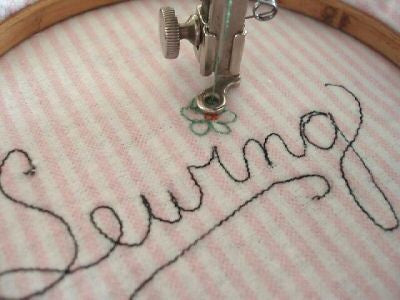
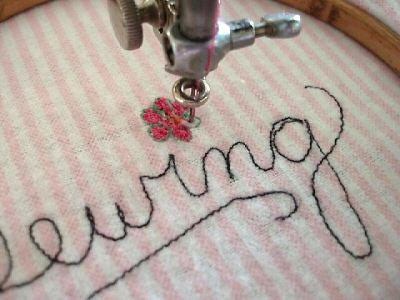
Be sure to look through all the images above for examples.
* Free-Motion Embroidery is not quite the same as Free-Motion Quilting. The hoops are not necessary for Free-Motion Quilting, but are especially helpful when tracing signatures or doing fine-detailed Machine Embroidery work (see photos for samples).
What makes a Machine Embroidery Hoop different from a hand-embroidery hoop?
Good question - well, first of all, its thickness. It is narrow for easy maneuverability under the embroidery foot / shank. A regular hand embroidery hoop, whether metal, plastic or wood, generally has a wider rim, making it difficult to get underneath the foot. Also, a regular hand embroidery hoop is not designed for constant motion simultaneous with the needle all the while holding the fabric consistently taut - which is of utmost importance. Therefore, this particular machine embroidery hoop is made of very sturdy high-quality wood. It will withstand constant motion and adjustment for your fabric thickness. I used one with a completed quilt (all layers) so I could machine embroider names of those who attended a baby shower.
Whether you use a vintage original embroidery attachment, a new reproduction embroidery attachment for low shank, slant shank or even go without and use only your needle, a Machine Embroidery Hoop is an essential for Embroidery or Darning work.
Instructions for use will be included. Free-Motion Embroidery / Darning Attachment and Feed Cover Plate are not included but are available for purchase here.
Quick View