


Blind Stitch Braider, Singer (Vintage Original)
These are original Singer parts and not reproductions... genuinely vintage! They are uncommon little attachments that accommodate either a 5/32", 1/8", 3/32" or 1/16" braid, trim or embellishment, depending on the foot.
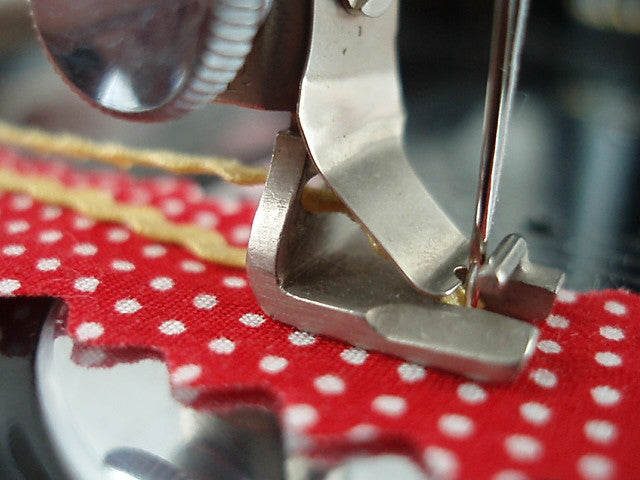
A Blind Stitch Braider Attachment applies braid to the fabric on the front side (opposite of the underbraider), but instead of stitching it on the top of the braid, it stitches on the bottom of the braid while applying it to the top of the fabric... This is really hard to explain, but a rather simple concept that you can view in the photographs above.
The braid feeds from the back of the foot, loops around under the foot, needle catches bottom side of braid simultaneously applying it to the surface of the fabric.
Granted, if you are unfamiliar with this attachment, it takes a lot of practice and you will need to follow the directions carefully, slowly and precisely.
Click here for instructions on how to use the Blind Stitch Braider.
LOW SHANK (only): fits the Singer Featherweight 221, 222K and all low, vertical shank Sewing Machines (i.e. 15, 27, 28, 66, 99, 185, 127, 128, 192, 201, 206, 237, 306, 319, 320, 328, as well as many other brands besides Singer)
Quick View